Home > User Guides > VLE Guide for Instructors > Adding H5P Interactive Content > Virtual Tour (360)
Virtual Tour (360)
Virtual Tour (360) is an H5P content type that is used for creating an activity that allows teachers to add questions, texts, and interactions to 360 environments.
Below is an interactive example of the Virtual Tour (360) content type.
In order to create a Virtual Tour (360) content type:
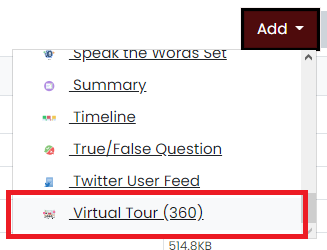
1. Go to your content bank, click the Add button, and choose Virtual Tour (360). Doing so will redirect you to the Virtual Tour (360) editor. Click the Enter Fullscreen button on the top-right of the editor to enable fullscreen editing.
2. Type the title you want to give to your new Virtual Tour (360) content type in the Title field. This will be useful if you want to search for the content later.

3. Add a new scene by clicking the New scene button. Doing so will make the Scene popup window appear. You will add your image here.
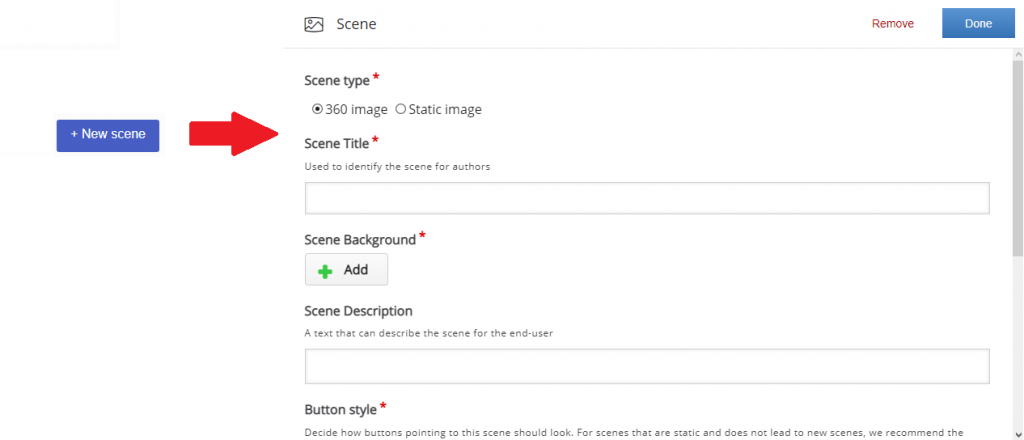
4. Choose your scene type by choosing on the radio buttons in Scene type. Enter the title of your scene in the Scene title field.

5. Click the Add button to add your image for the scene background. The image that you will upload will depend on what scene type you chose. If you chose the 360 image scene type, then you must upload a 360 panoramic image. You can find these images on the internet. An image with a 2048×1024 dimension (or with a 2:1 aspect ratio) is recommended. Meanwhile, if you chose the static image scene type, then any image will do. After uploading your image, you can remove the image or edit it and its copyright details. You can also add an optional description for the scene.

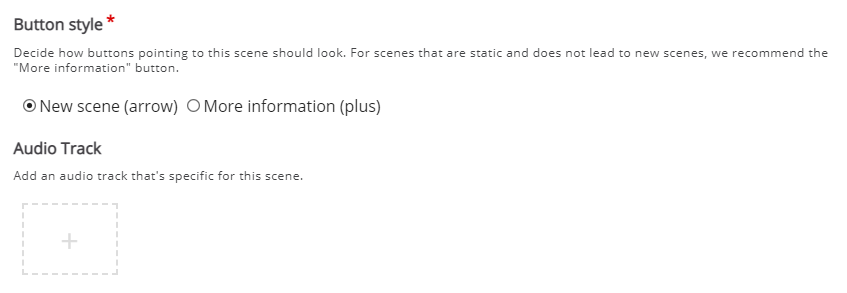
6. You can decide the style of the buttons pointing to this scene. It is selected by default to the New scene (arrow) radio button (used for 360 panoramic images). If your scene contains a static image, choose the More information (plus) radio button. You can also add an optional audio track that will be played for this specific scene.
7. Click Done if you are done editing the scene. Your editor should now look like the example below. You can drag the scene to look around the image. Click the Reset Camera button ![]() at the bottom-left corner to reset the camera angle (which is set by default). You can change it by dragging the scene and pressing the Set starting position button
at the bottom-left corner to reset the camera angle (which is set by default). You can change it by dragging the scene and pressing the Set starting position button ![]() at the bottom-right corner.
at the bottom-right corner.
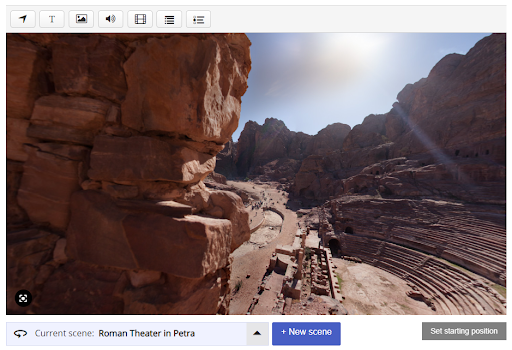
8. In the bottom-left corner, there is a dropdown menu which you can use to navigate between your scenes. An icon above the image indicates if the scene is 360 ![]() or static
or static ![]() . Highlight a scene in order to manipulate it. You can add new scenes by clicking the New scene button beside the dropdown menu.
. Highlight a scene in order to manipulate it. You can add new scenes by clicking the New scene button beside the dropdown menu.
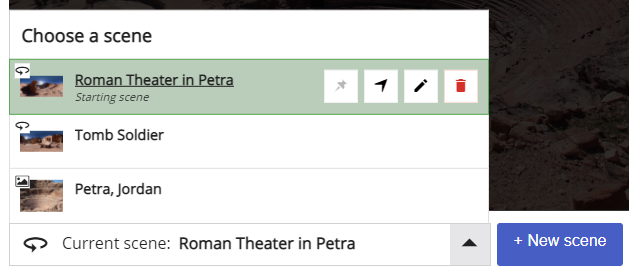
9. At the top of the editor, there is a toolbar that contains interactions which you can add to your scenes. You can add Go To Scene ![]() , Text
, Text ![]() , Image
, Image ![]() , Audio
, Audio ![]() , Video
, Video ![]() , Summary
, Summary ![]() , and Single Choice Set
, and Single Choice Set ![]() interactions.
interactions.

10. In the Behavioural settings section, you can manipulate how your content will behave.
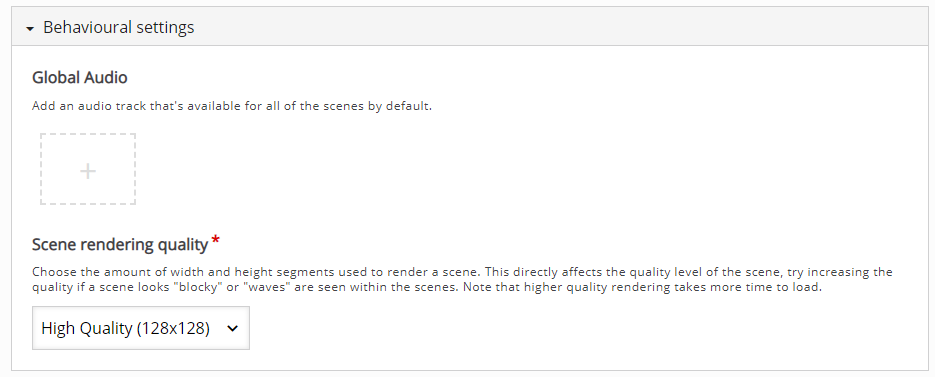
11. Click the Save button if you are done editing. It will now be added to your content bank for future use.