Home > User Guides > VLE Guide for Instructors > Creating Assignments > Creating Assignments
Creating Assignments
This page explains the settings involved when first creating an assignment. To add an assignment to your course page:
With the editing turned on at the course main page, locate the section you wish to add your lesson then click the Add an activity or resource link and choose Assignment. All settings may be expanded by clicking the Expand all link at the top right corner.
Configure the following assignment settings:
General
Give your assignment a name (which students will see to click on) and, if required, a description. If you want the description to display on the course page, check the box.
- Additional files
- Here you can add files which may be of help to the students as they do their assignment, such as example submissions or answer templates.

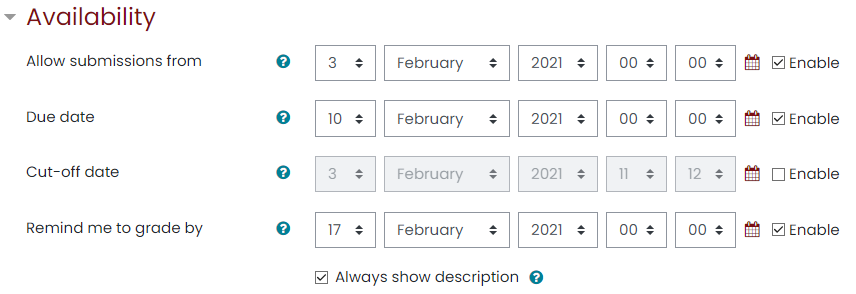
Availability
- Allow submissions from
- This stops students from submitting before the shown date but it doesn’t hide the assignment and any included instructions or materials.
- Due date
- Submissions are still allowed after this date but will be marked as late. Disable it by unticking the checkbox. Assignments without a due date will appear on the dashboard with ‘No Due Date’ displayed.
- Cut-off date
- After this date, students will not be able to submit and the submit button will disappear.
- Remind me to grade by…
- A date needs to be entered here for the assignment to display on the teacher’s Course overview block and in the Calendar. It will display when at least one student has submitted.
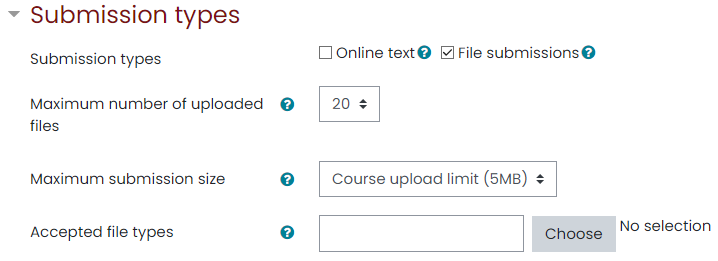
Submission types
Here you can decide how you wish students to submit their work to you.
- Online text
- Students type their responses directly using a text editor.
- Word Limit
- It is possible to set a word limit on an online text assignment. Students get a warning if they try to exceed the word limit. Numbers are counted as words and abbreviations such as I’m or they’re are counted as single words.
- File submissions
- Students can upload one or more files of any type the teacher can open.
- Maximum number of uploaded files
- If file submissions are enabled, each student will be able to upload up to this number of files for their submission.
- Maximum submission size
- The maximum upload size refers to each file a student uploads. It cannot be larger than the limit in the Course settings.
- Accepted file types
- The teacher can specify the types of file the students may upload to the assignment. A file type selector appears upon clicking ‘Choose’, offering a choice of different file types. Leaving the field blank will allow all file types.
Feedback types
- Feedback types
- Feedback comments
- With this enabled, you can leave comments for each submission (which appear on the assignment grading screen.)
- Annotate PDF
- If this is enabled, you can create annotated PDF files when grading student submissions. This allows you to add comments, drawing, and stamps directly on top of the student’s work.
- Offline grading worksheet
- This is useful if you wish to download the grading list and edit it in a program such as MS Excel. When the teacher has completed their grading offline, they can then upload the spreadsheet, confirm the changes and the grades and comments will be transferred over into the gradebook.
- Feedback files
- This allows you to upload files with feedback when marking. These files may be the marked up student assignments, documents with comments, a completed marking guide, or spoken audio feedback. It enables the Feedback Files column in the assignment grading screen (accessed from ‘View/Grade all submissions’.) To upload feedback files, click on the green tick in the grade column on the grading table and then upload either with drag and drop or using the File picker.
- Comment inline
- This usefully allows you to comment directly on an ‘online text’ type submission.

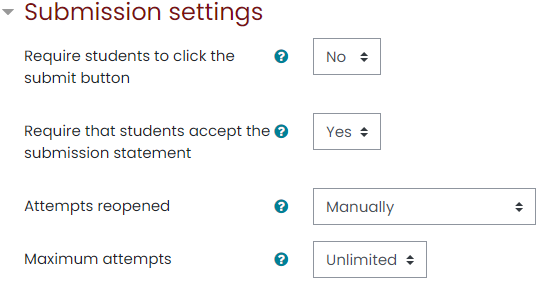
Submission settings
- Require students click submit button
- If this is set to ‘No’, students can make changes to their submission at any time. If you want to stop them changing work once you are ready to grade, click ‘View/Grade all submissions’; locate the student and From the Edit column, click the action icon and select ‘Prevent submission changes.’
- If set to ‘Yes’, students can upload draft versions of the assignment until such time as they are ready to submit. Clicking the submit button tells they have finished drafting and want the work to be graded. They can no longer edit it and must ask the teacher to revert to draft status if they need to change it again. To do that, click ‘View/Grade all submissions; locate the student and from the Edit column, click the action icon and select ‘Revert the submission to draft’.
- Require that students accept the Submission statement
- If enabled, the students are required to accept the submission statement for all submissions to this assignment.
- Attempts reopened
- If ‘require students to click submit’ is enabled, then students may only submit once. You can change this here to ‘Manually’ and reopen it for students to resubmit, or you can change it to ‘Automatically until pass’, for the students to keep resubmitting until they get a pass grade.
- Maximum attempts
- Here you can decide how many attempts to allow if students can resubmit. If a student must keep trying until they get a pass grade, you might decide to limit the attempts even though they have not yet passed.
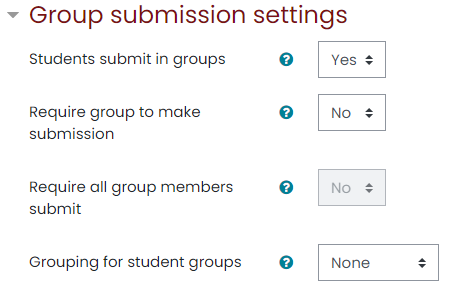
Group submission settings
These settings allow students to collaborate on a single assignment, e.g., working in the same online area or uploading, editing and reuploading an MS PowerPoint in the common assignment area.
When grading, you may choose to give a common grade and feedback to all students in the group or to give individual grades and feedback to each member.
- Students submit in groups
-
- If enabled, students will be divided into groups based on the default set of groups or a custom grouping. A group submission will be shared among group members and all members of the group will see each other’s changes to the submission.
-
- Require group to make submission
-
- If enabled, students who are not members of a group will be unable to make submissions.
-
- Require all group members submit
-
- This setting will only appear if the teacher has ticked the “Require students click submit button” earlier. The assignment will not be classed as “submitted” until all members of the group have contributed. When one student has submitted, the other members of the group will be able to see who still must submit.
-
- Grouping for student groups
-
- If a grouping is selected here, then the gradebook will display any other groups and non-grouped students in the “default group”, while naming the group(s) that are in the chosen grouping. If “none” is selected, then the gradebook will display the names of all groups and put any non-grouped students in the “default group”.
-
Notifications
- Notify graders about submissions
- If enabled, graders (usually teachers) receive a message whenever a student submits an assignment, early, on time and late. Message methods are configurable.
- Notify graders about late submissions
- If enabled, graders (usually teachers) receive a message whenever a student submits an assignment late. Message methods are configurable.
- Default setting for “Notify students”
- This sets the default value for the ‘Notify students’ checkbox on the grading form.

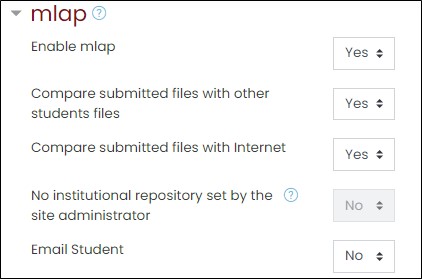
mLaP
The moodLearning anti-plagiarism service (mLaP) provides the information that helps the teacher determine whether a submitted piece has been plagiarized. It comes in a form of percentages of similarities, ranging from 0 to 100%.
Enable mLaP and select YES to comparing student files, with Internet documents, and emailing students options, unless you have a different preference. The local repository option needs a special set-up not done by default. Contact your system administrator if you also want this.
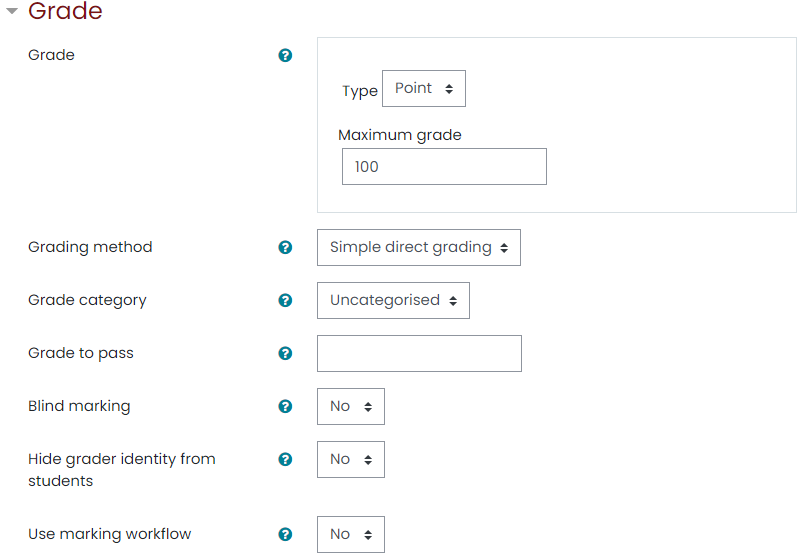
Grade
Set a grade, grading method, and grade category here, along with the grade to pass which may be connected with Activity completion and Conditional activities such that a student will not be able to access a follow up activity until they have obtained the required grade in the lesson. See Chapter 6 for more information about grades.
- Blind marking
- Blind marking hides the identity of students from the grader. Blind marking settings will be locked once a submission or grade has been made in relation to this assignment.
- Hide grader identity from students
- If enabled, the identity of any user who grades an assignment submission is not shown, so students cannot see who marked their work.
- Note that this setting has no effect on the comments box on the grading page.
- Use marking workflow
- If enabled, marks will go through a series of workflow stages before being released to students. This allows for multiple rounds of marking and allows marks to be released to all students at the same time.
Other settings
Choose the ‘Common module’, ‘Restrict access’, ‘Activity Completion’, and ‘Tags’ settings as you would when you set up any resource or activity. These general settings are further discussed in Activities and Resources: General Settings.