Home > User Guides > VLE Guide for Instructors > Virtual Learning Environment Basics > Course Import
Course Import
1. Access the desired course from the My courses dropdown list of the navigation tray, or from the Recently accessed courses block or Course overview block located at the dashboard.
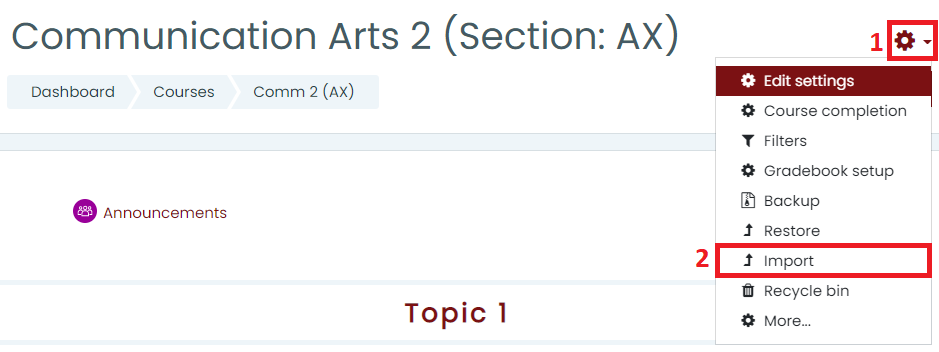
2. At the upper right corner of the course main page, click the Settings ![]() icon. A dropdown list will appear as shown below then select the Import
icon. A dropdown list will appear as shown below then select the Import ![]() link. This will redirect to you the ‘Import course’ page.
link. This will redirect to you the ‘Import course’ page.
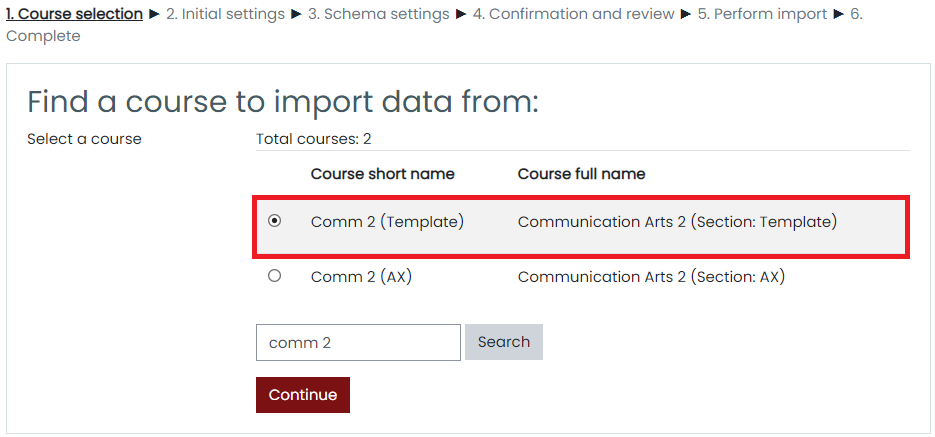
3. Select the template course to import data from by clicking the circle beside the course short name.
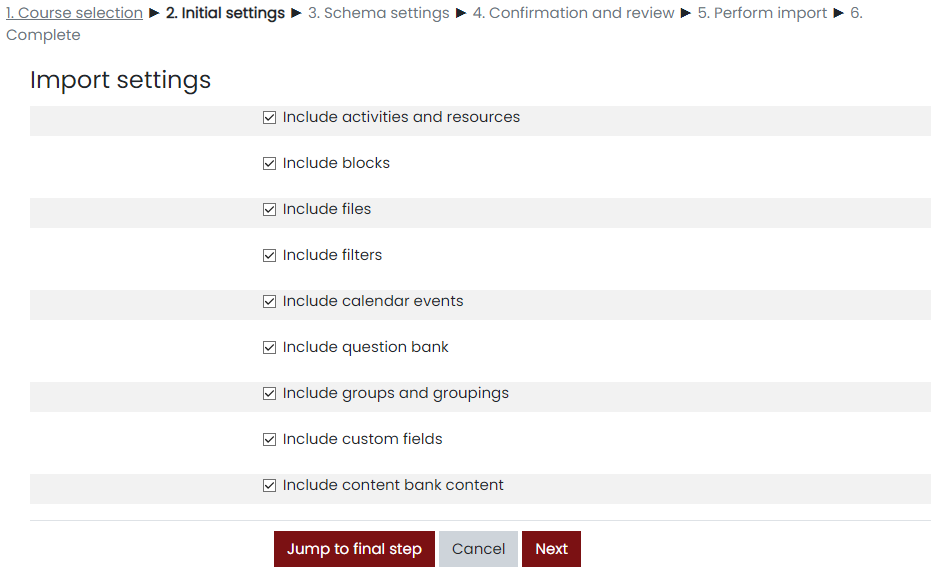
4. For the initial settings, select the items that you want to include by ticking the checkbox beside each option. Scroll down and click the Next button to proceed.
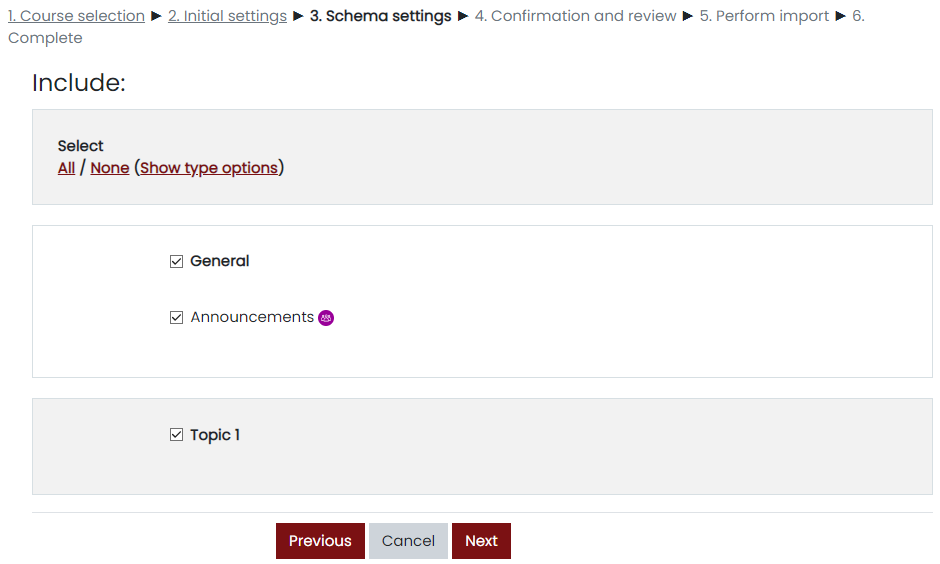
5. Next, setup the schema settings. The Include All/None links at the top will check or uncheck all the boxes in a column. Check the box of the sections, activities, and resources that you want to include. Click the Next button to continue or Previous button to edit the preceding settings.
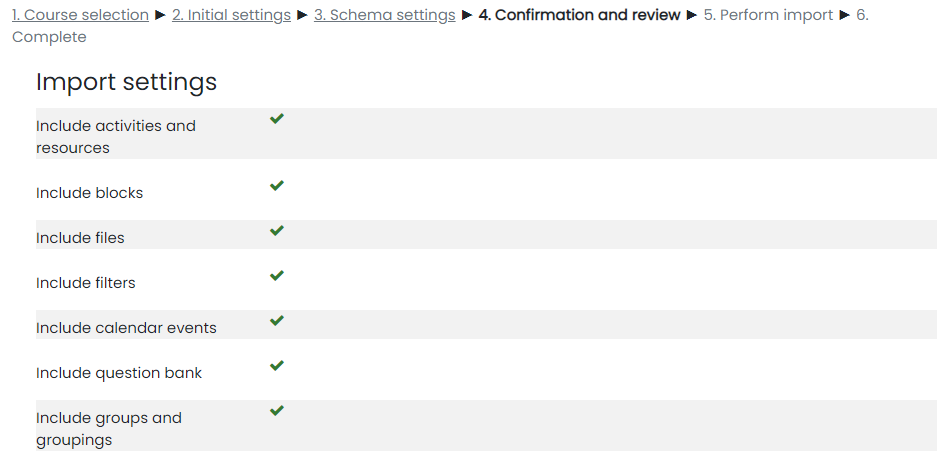
6. Check if all desired items are included. Click the Previous button to edit, otherwise click the Perform import button to start the import process.
7. The progress of the import process is displayed with a report if it was successful. Click Continue to see the course main page with the imported contents. Click the Turn Editing On button to continue adding content to your course.

