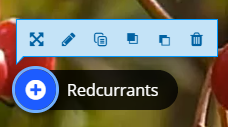
Home > User Guides > VLE Guide for Instructors > Adding H5P Interactive Content > Interactive Video
Interactive Video
Interactive Video is an H5P content type that allows teachers to add interactions on top of video clips. Teachers can add questions, texts, images, links, and tables.
Below is an interactive example of the Interactive Video content type.
In order to create an Interactive Video content type:
1. Go to your content bank, click the Add button, and choose Interactive Video. Doing so will redirect you to the Interactive Video editor. Click the Enter Fullscreen button on the top-right of the editor to enable fullscreen editing.
2. Type the title you want to give to your new Interactive Video content type in the Title field. This will be useful if you want to search for the content later.
3. Press the + button and choose either to Upload video file if you have a video clip to be uploaded or Paste YouTube link or other video source URL if you have a link of your video. Click Insert if you are done.
4. Enter the quality level of the video you inserted. You may consider adding the same video with an alternate video format or quality.
5. If you do not own the uploaded video, press the Edit copyright button to edit its copyright details.
6. In the Interactive Video settings, you can enter the title of the interactive video, a short description, and a poster image.
7. In the Text tracks settings, you can add subtitle tracks to the video.
8. Press the Add interactions tab in the top of the editor or the Add interactions button below the editor to move to the next step.
9. You will see a toolbar at the top of the video. It contains buttons that can be clicked or dragged and dropped onto the video. Doing so will add interactions anywhere in the video.
There are three different kinds of interactions that you can add to the video:
- Simple interactions
- These interactions can add helpful information to the video. It is presented as a blue button (except for the label and image interactions, which will immediately display text and image, respectively). Under this category are the Label , Text , Table , and Image interactions.
- Quiz interactions
- These interactions will add a quiz to the video where students can answer to test their knowledge regarding the content of the video. It is presented as a purple button . Under this category are the Statements(Summary) , Single Choice Set , Multiple Choice , True/False Question , Fill in the Blanks , Drag and Drop , Mark the Words , and Drag Text interactions.
- Adaptability interactions
- These interactions will add a space to the video where students can click to move to a specific time in the video or be redirected to another website. Under this category are the Link , Crossroads , and Navigation Hotspot interactions.
After adding interactions to the video, you can click them and a popup menu will appear. You can use this to move, edit, copy, bring to front, send to back, and delete the interaction.
10. At the bottom of the video, you can find the Bookmarks button which you can use to add bookmarks to specific times in the video to make it easier for students to jump around the video.
11. Press the Summary task tab in the top of the editor or the Summary task button below the editor to move to the last step.
12. You will be redirected to the Summary settings. Summary is shown at the end of the video, which is intended to make the students reflect on the content presented in the video. Note that this is only optional, so you can opt not to put a summary at the end. If you choose not to add a summary, proceed to the last step, else refer to the Summary tutorial for the tutorial on how to make a Summary.
13. Move to the Overall Feedback section to add and customize the overall feedback the students will get after answering.
14. Click the Save button if you are done editing. It will now be added to your content bank for future use.