Home > User Guides > VLE Guide for Instructors > Grading Students’ Progress and Knowledge > Setting up the Gradebook
Setting up the Gradebook
Create and Arrange Grade Items and Categories
When you add activities (e.g., Assignments or Quizzes) to a course, corresponding grade items (columns) are added to the course gradebook. The system also lets you manually add columns to your gradebook to record extra grade items (e.g., if you administer an offline midterm exam). In both cases, it is fine to build your gradebook as you go, but when it is time to calculate final grades, the organization of these items is essential to making sure you get the correct results.
The Gradebook setup page in the gradebook (under Setup tab) is used to rearrange grade items, add columns and categories, and customize how students’ grades are calculated. The page displays settings for all grade items in a single table.
Add a grade item
A grade item is a unit (typically an activity) where course participants are assessed through a grade or mark. As such, a grade item is a container for grades and a set of settings applied to these grades. The settings affect the calculation and display of the grades in the gradebook reports and exports.
Grade items may refer to course activities (e.g. a quiz, an assignment etc.), Outcomes or manual grades. They are represented by columns in the grader report.
Within a category, a grade summary is also a grade item itself. Summary grade items for a category can show up in reports and can be used in the calculation of the grade for the parent category.
When you add any graded activity (such as an Assignment or Quiz) to a course, a corresponding grade item (column) is automatically added to the gradebook. You can also create grade items (columns) not linked to activities by adding them manually on the Gradebook setup page.
To manually add a grade item:
1. Go to the Gradebook page, select the Setup tab and Gradebook Setup. See Gradebook Views to access the gradebook page.
2. Scroll to the bottom of the page and click Add grade item. The New grade item page will open.
3. In the Item name field, enter a name for the column. Use short, alphanumeric names; do not use special characters, commas, ampersands, or quotes.
4. The Grade type setting controls the kind of values that can be input for a grade item. Only Value and Scale types can be used in aggregations. Only Value, Scale, and Letter grade types can be used in custom grade formulas.
- Grade Types for Activities
- The grade type displayed for an activity-based grade item (such as an assignment or quiz) will vary according to the settings you chose while configuring the activity on the Activity settings page. There are 3 grade types:
- Value (Points): A numerical value between the Maximum grade and Minimum grade.
- Scale: An item from a predefined list of terms (such as Check Minus, Check, Check Plus).
- None: This option prevents grades from being recorded and prevents calculation in the Grader Report and User Report.

- Grade Types for Manually-created Grade Items
- For manually-created grade items, a different set of grade types is available (for details on manually adding a column to the gradebook:
- Value: A numerical value between the Maximum grade and Minimum grade.
- Scale: An item from a predefined list of terms.
- Text feedback only: Only text can be input into the Feedback field of a student’s grade. Feedback displays by default on the User report.
- Letter: Allows you to enter or import a Letter grade which can be used in a custom grade formula.
- None: This option is available for category totals only. It prevents grades from being recorded and removes the category total from the Grader Report, User Report, and Categories and items page. The category total will return after switching to a different grade type.
5. The Grade display type setting controls how a category total or grade item will display in the Grader report and the User report.
- Letter: The numerical value is converted to a letter value using the scale found on the Letters tab of the gradebook.
- Percentage: The numerical value is divided by the maximum possible points and displayed as a percentage of the maximum points.
- Real: The item’s raw numerical value.
6. The Overall decimal points setting determines the number of decimal places to display for each grade item. This setting does not round values for calculations. If the value is used in a custom grade formula, the real numerical value will always be used, which is made with an accuracy of 5 decimal places.
7. Setting an ID number provides a way of identifying the activity for grade calculation purposes in Custom Grade Formulas in the Gradebook. If the activity is not included in a custom grade calculation, the ID number field may be left blank.
8. You can also set the following advanced options:
- Hidden: If checked, grades are hidden from students.
- Hidden Until: If set, grades are released after the set date.
- Locked: If checked, grades are no longer automatically updated by the related activity and cannot be edited by Non-Editing Teachers.
- Locked After: If set, grades can no longer be edited after the set date.
9. In the Minimum and Maximum grade field, set the minimum and maximum point value for the grade item, respectively.
10. (Optional) If you are using gradebook categories, you can select the category from the Parent Category dropdown menu.
11. When finished, click Save changes.
Add a Category
Grades can be organized into grade categories. A grade category has its own aggregated grade which is calculated from its grade items. There is no limit to the level of nesting of categories (a category may belong to another category). However, each grade item may belong to only one category. Also, all grade items and categories belong to at least one, permanent category: the course category.
Grade categories are useful for grouping assignments together, calculating subtotals, and making special calculations such as dropping the lowest grades.
To manually add a grade category:
- Go to the Gradebook page, select the Setup tab and Gradebook Setup. See Gradebook Views to access the gradebook page.
- Scroll to the bottom of the page and click Add category. The New category page will open.
- Enter a Category name and select category options. (Click headings to open collapsed settings areas and click Show more… to view and adjust additional settings under a heading.)
- Important options include:
- Aggregation: The type of calculation for items in this category. See Aggregation Methods
- Exclude empty grades: (Selected by default) If checked, empty grades are not aggregated into grade calculations (i.e., The system assumes that the assignment has not yet been graded or assigned and therefore should not yet count against students). If unchecked, empty grades are calculated as “0.”
- Drop the lowest: Exclude a set number of grade items with the lowest value from being calculated in the category total.
- Scroll to the bottom of the page and click Save changes. The Categories and items page will open, displaying the new category.
Managing Grade Items & Categories
Move Grade Items & Categories
To change the order of columns in the Grader report, move grade items into categories, or move categories:
- Go to the Gradebook page, select the Setup tab and Gradebook Setup. See Gradebook Views to access the gradebook page.
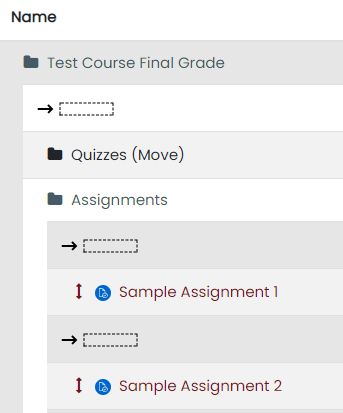
- At the left of the Grade item or Category you want to move, click Move
 (Move icon, looks like a vertical line with an arrowhead pointing up and an arrowhead pointing down.). The word (Move) will appear next to the item to be moved, and dashed rectangles will appear in the possible locations where the item can be moved.
 - Click any of the dashed rectangles to move the item to that location. The page will refresh showing the item in the new location.
- You can cancel your action at any time by clicking Cancel at the bottom of the page
- If you move a category that contains items and/or sub-categories, all its contents will also be moved to the new location.
Move Multiple Grade Items at Once
To move multiple grade items into a category at the same time:
- Go to the Gradebook page, select the Setup tab and Gradebook Setup. See Gradebook Views to access the gradebook page.
- On the far right, under the Select column heading, select the checkbox for each grade item to be moved into a category.
- Scroll to the bottom of the page and under Move selected items, click Choose… to open the drop-down menu and select the name of a Category. The page will refresh with the items moved into the category.
Delete Grade Items & Categories
Grade items and categories that were manually created in the gradebook can be deleted from the Gradebook Setup page.
Note: Grade items associated with activities (such as an Assignment or Quiz) can only be deleted from the gradebook by deleting the activity from your main course page.
- Go to the Gradebook page, select the Setup tab and Gradebook Setup. See Gradebook Views to access the gradebook page.
- Choose a manual grade item to delete.
- Under the Actions column of the selected grade item, click Edit and select Delete link from the drop-down list. The Delete confirmation page will open.
- On the Delete confirmation page, click Yes.
Note: If you delete a category containing items, those items will not be deleted but will instead be moved into the parent category.
Grade Editing in the Gradebook
Note: Editing anything in the gradebook refers to editing the grades only and none of the available operations bear any relationship to editing the main course page i.e. the appearance of your course page cannot be influenced by anything you do in the gradebook. The “Turn editing on” button functions separately from the main course one, so editing can be on in the gradebook, but simultaneously off when you switch back to course view. This is because editing grades and editing the course page are separate capabilities.
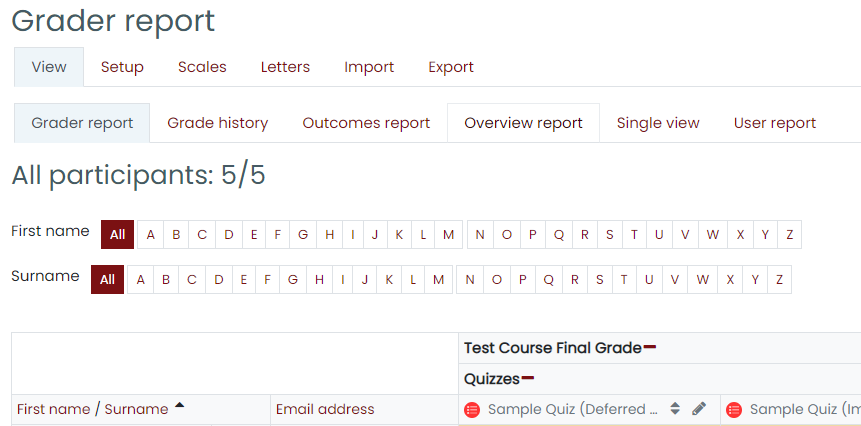
You can edit the grades of the students directly at the course activities. Here, grades are edited from the grader report or gradebook page. Select the View tab.
Altering the grades
Click the “Turn editing on” button at the top right of the page to show the edit icons next to each grade. Clicking on an edit ![]() icon will bring up the editing screen for that grade which will allow you to set the grade, its written feedback, and several other attributes.
icon will bring up the editing screen for that grade which will allow you to set the grade, its written feedback, and several other attributes.
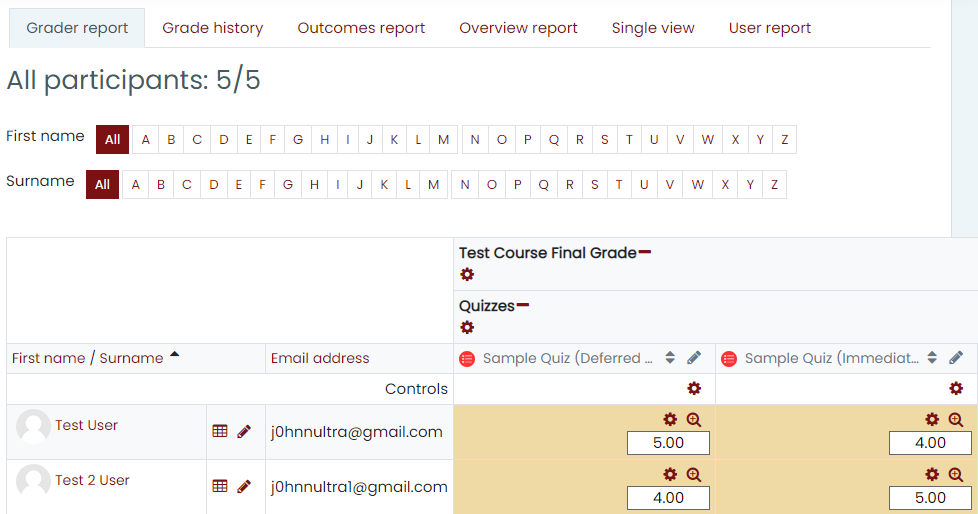
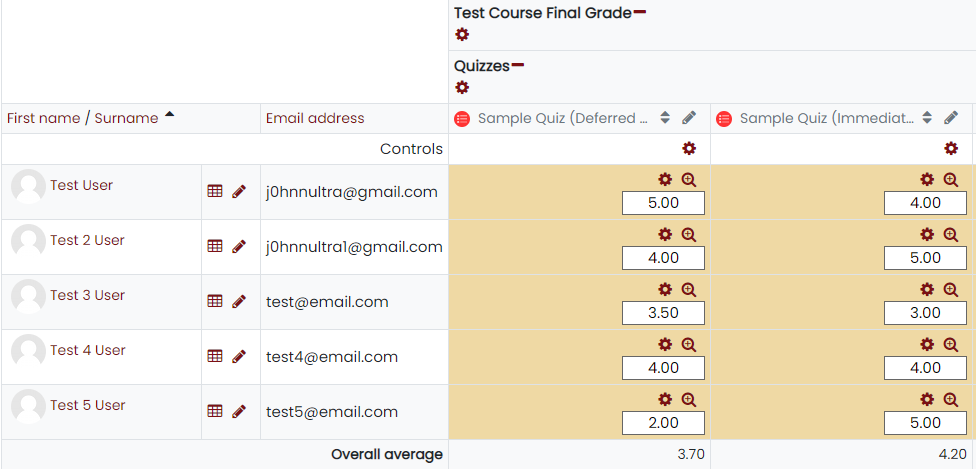
Alternatively, you can choose “Quick grading” and “Quick feedback” in ‘Preferences’ to make the report appear with editable boxes containing each grade, so you can change many at once. Enter the grade at the left text box and the feedback at the right text box. This capability can be a real time saver, but make sure to save at reasonable intervals so as not to lose lots of changes.
Note: If you make changes here, they are then shown highlighted to indicate grades which have been manually changed.
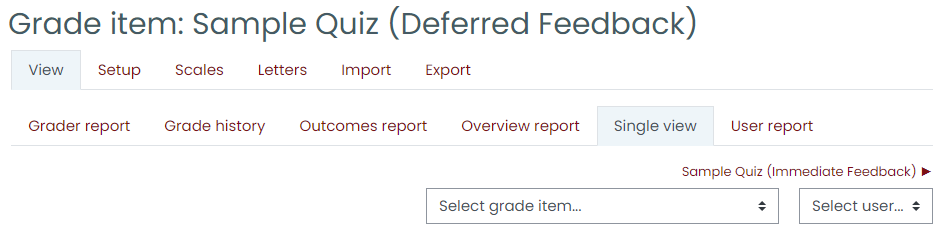
Altering the grades using Single View
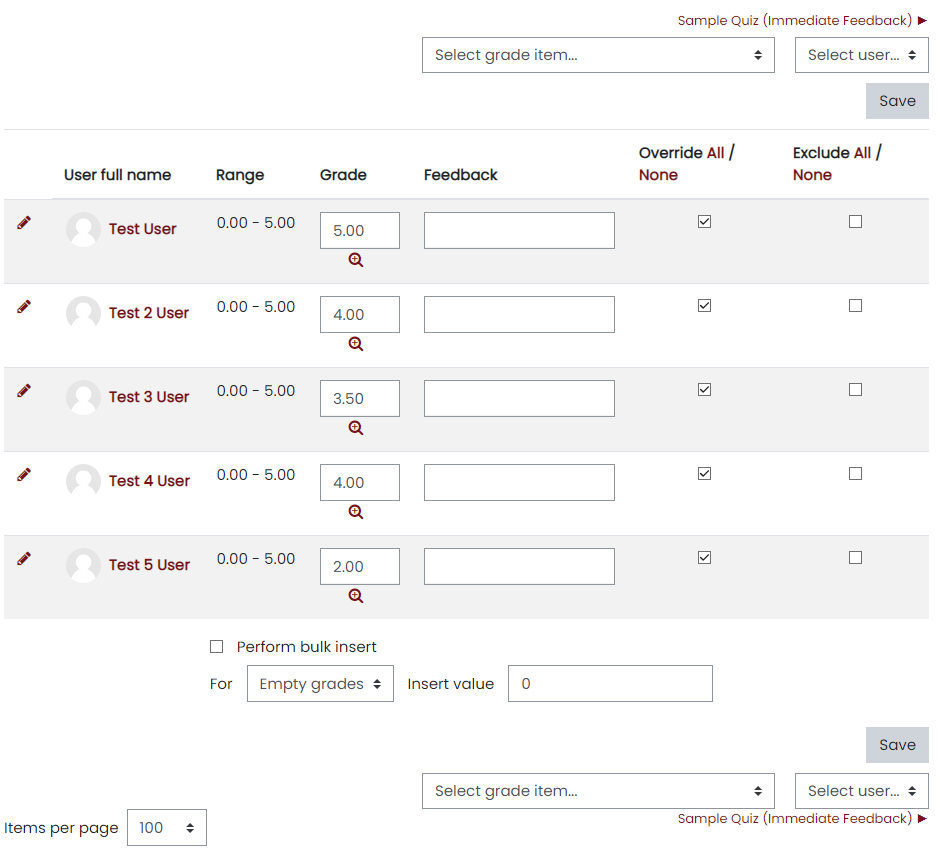
Under the Single view tab, you can enter grades in bulk for a specific grade item or a specific user. First, you must select the grade item and/or the student as shown below.
To change a specific grade or all grades, click on the Override checkbox by the specific grade row or use the Override All link to check every row. If you wish to override all grades with a set grade, check the Bulk Insert checkbox and enter the grade that you wish to insert. You can select whether to fill the grade for just empty grades or for all grades from the dropdown list. Click on Save and you will now see in the Grader Report that all grades the specific item/user have been overridden with the grade/grades that you entered.
Recalculating
If you change any part of an assessment e.g. alter the maximum grade for one of the questions in a quiz, you may find that the columns do not yet reflect the change you have made. Click Turn editing on twice to force the gradebook to re-check.
Calculate Grades
The simplest way to calculate grades is to let the system handle calculations. There are built-in calculations (aggregations) to compute the score for the entire course (and subtotals if you need them). You can also aggregate grades as Natural (which means Sum of grades), Mean of grades, and Custom weights (where weights are applied to individual items or categories as a percentage of the total grade). You can also create a custom formula if you require additional operations.
Configure Grade Calculation
Grade calculations depend on how grade items and categories are arranged on the Gradebook Setup page. To configure how grades are calculated, you will first need to choose an aggregation method in the Category Settings. Once applied, aggregation methods will calculate the course total and subtotals for categories (if any).
By default, a grade category will calculate all items in that category. If a category contains a sub-category, then the sub-category total value will be used in the parent-category calculation.
To set a calculation method for a category:
1. Go to the Gradebook page, select the Setup tab and Gradebook Setup. See Gradebook Views to access the gradebook page.
2. Locate the row that contains the title of the category. In the Actions column (at right), click Edit. The Edit settings drop-down menu will open.
3. Click Edit settings (Edit category icon). The Edit category page will open. See image below. Note: The Edit category settings for the course total can be found in the top row of the Gradebook setup table.
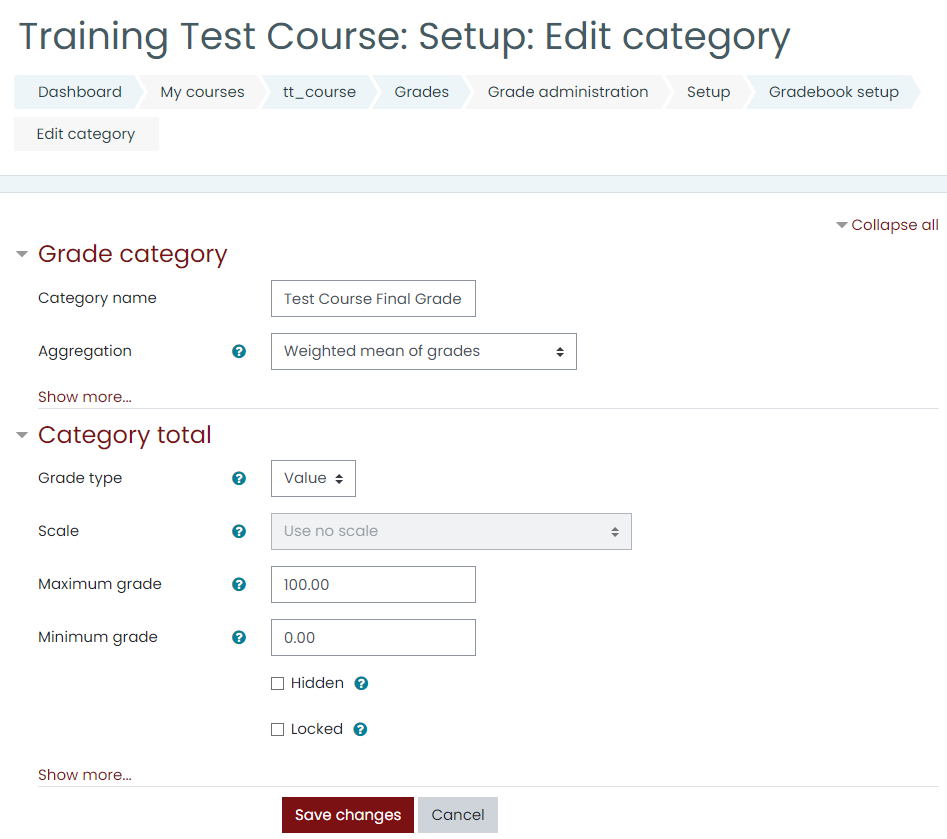
4. Select a calculation method from the Aggregation drop-down menu. Options include:
- Mean of Grades
- Custom Weights
- Natural
5. At the bottom of the page, click Save changes. The Gradebook Setup page will open.
Aggregation Methods
To configure how grades are calculated, choose a calculation method by editing Category Settings. The three aggregation methods are described below.
Mean of Grades
What it does:
- Calculates the average of all grade items in the category (the sum of all grades divided by the number of grade items).
- If items in the category have point values different from the Max Grade of the category, grades will be adjusted proportionately.
- Does not allow grade items to be marked as Extra Credit.
- Allows categories to use Drop the lowest.
When to use it:
- To find the average percentage of multiple items.
Custom Weights
What it does:
- Each graded item is assigned a value (Weight) used to determine its relative importance in the overall calculation. Items with higher values will count more toward the final average. The weight does not need to be the same as the possible points for an item. If an item has a weight of “0,” it will not be calculated in the total.
- If items in the category have point values different from the Max Grade of the category, grades will be adjusted proportionately.
- Does not allow grade items to be marked as Extra Credit.
- Allows categories to use Drop the lowest.
When to use it:
- To work with items or categories that are each worth a different percentage of the final grade. If using this method to compute the course total, we suggest weights add up to 100.
Natural
What it does:
- Finds the sum of points for all items in the category.
- Allows grade items to be marked as Extra Credit.
- Allows categories to use Drop the lowest when specific criteria are met.
When to use it:
- To see the total number of points a student has earned out of the total points possible. It is also possible to change a category total to display a percentage of points earned instead of the real numerical points.
Additional Options
Additional options appear on the Gradebook Setup page depending on the aggregation methods you select. Three important options are described below.
Weight
What it does:
- Appears only when the Custom Weights or Natural aggregation is used. This field sets the numerical weight of an item relative to other items in the same category. Items with a weight of “0” are not calculated in the category total.
When to use it:
- To work with items or categories that are each worth a different percentage of the final grade. If using this method to compute the course total, we suggest that weights add up to 100.
- Note: When using the Natural aggregation method, the gradebook will automatically update weights to indicate a grade item’s relative value compared to other items in the category. Weights can be adjusted by selecting the Weights checkbox for the item on the Gradebook Setup page or navigating to the Settings page of the item.
Extra Credit
What it does:
- This option is only available when Natural is used as the aggregation method.
- Items marked as extra credit are not included in the Max Grade of the category. Instead, extra credit items are added to the category total after the initial calculation.
- Weights can be adjusted for extra credit items.
- It is possible for a student to receive a category total that is higher than the Max Grade.
When to use it:
- To enter bonus points that will be added on top of a student’s category total.
Max Grade
What it does:
- Sets the maximum possible points that can be awarded in a category (the points required to receive 100%).
When to use it:
- With Natural aggregation, Max Grade is calculated automatically as the sum of all grade items that are not marked as extra credit.
- With Mean of Grades and Custom Weights, if items in the category have point values different from the Max Grade, the category will adjust grades proportionately.
- Note: Letter grade display uses the percentage value of the Max Grade of a category to calculate the numeric to letter conversion.
Custom Grade Formulas
A grade formula is a calculation used to determine grades that is based on other grade items and numeric calculations. You can use the Calculation tool in the Gradebook to create your own formulas as an alternative to the preset calculations.
To create a custom grade formula, first you will assign ID values to columns in the gradebook (used to identify items in your formula), and then you will input the custom formula.
Open the Edit Calculation Page
To open the edit calculation page:
- Go to the Gradebook page, select the Setup tab and Gradebook Setup. See Gradebook Views to access the gradebook page.
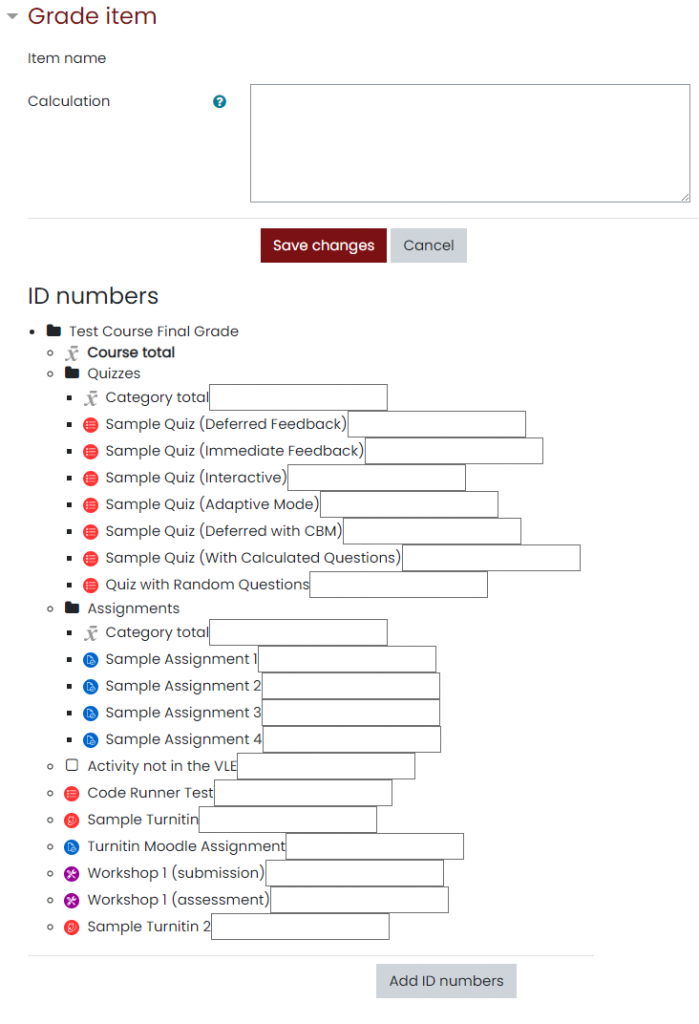
- Locate the item for which you would like to create a calculation, and under Actions (at far right), click Edit, and from the drop-down menu, select Edit Calculation of edit calculation in gradebook setup. The Edit calculation page will open. See image below.
Note: The Edit Calculation icon will only be available next to category totals, manually created grade items, and the Course total.
Assign Column ID Numbers
To use existing grade items in a custom formula, you must first assign ID Numbers (short text labels), which are used as variables in the text of the formula. Columns are referenced in a formula by placing double square brackets ( [[…]] ) around the ID Number (e.g., a grade item with the ID Number “Quiz3” will be referred to as “[[Quiz3]]” in the formula).
- On the Edit Calculation page, below the Calculation field, is a list of all grade items. In the text box provided, enter an ID number value for each grade item you want to use in the formula. Values can include text, spaces, and numbers, however short names are strongly recommended (i.e., “Quiz3”, “Exam 1”, etc.).
Note: If a grade item already has an ID number (surrounded with double square brackets) instead of an input field, you can use this ID number in your formula.
- After you have entered ID numbers, check them carefully; you will only have one chance to save them.
- To save your ID numbers, click Add ID numbers (at bottom). The page will refresh to show an updated list of grade items and corresponding ID numbers.
Create a Formula
Custom formulas for the gradebook follow the pattern of formulas/functions in popular spreadsheet programs. Formulas start with an equal sign (=) and use common mathematical operators and functions to produce a single numerical output. This output is then used as the computed value for the grade item you are editing.
Common calculation functions and operations include the following:
- average([[item1]], [[item2]]…): Returns the average of the values in a list of arguments
- ceil(number): Maps a real number to the smallest following integer
- floor(number): Maps a real number to the largest previous integer
- if([[item1]], [[item2]], [[item3]]): Evaluates the first argument (condition) and returns the second argument if the condition is not zero (true condition) and returns the third argument if the condition is zero (false condition).
- max([[item1]], [[item2]]…): Returns the maximum value in a list of arguments
- min([[item1]], [[item2]]…): Returns the minimum value in a list of arguments
- mod(dividend, divisor): Calculates the remainder of a division
- pi(): Returns the value of the number Pi (3.14159265…)
- power(base, exponent): Raises a number to the exponent power (this is the same as base^exponent)
- round(number, count): Rounds number to count decimal digits
- sum([[item1]], [[item2]]…): Returns the sum of all arguments (this is the same as [[item1]]+[[item2]]+…
For a full list of available functions, see Grade Calculations.
Note: There are no logical conditional (IF, AND, OR) statements in the Calculator tool.
- In the Calculation box, start by entering an equal sign (=).
- Enter the calculation function you wish to use.
Example: =sum
- Enter an open parenthesis.
Example: =sum(
- Enter your ID numbers being sure to include the double square brackets.
Example: =sum([[quiz1]]
- Separate additional ID numbers with a comma.
Example: =sum([[quiz1]],[[quiz2]],[[quiz3]]
- Enter a close parenthesis.
Example: =sum([[quiz1]],[[quiz2]],[[quiz3]])
- Click Save Changes (below the Calculation box).