Home > User Guides > VLE Guide for Instructors > Quizzing and Testing >  Administer, Review, and Grade Quizzes

Administer, Review, and Grade Quizzes

Quiz layout

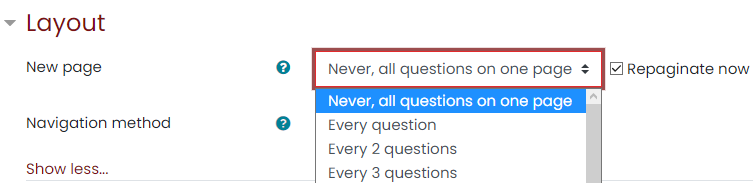
  • You can choose in the Layout section of the quiz settings whether to have a new page for every question or after a certain number of questions.
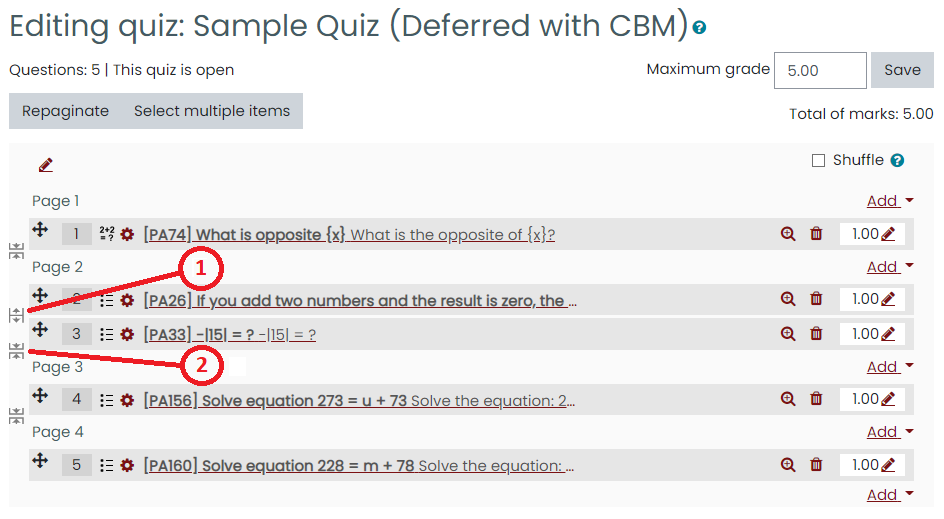
  • You can add a page break between questions by clicking the arrow icon (where the arrows are pointing away from each other). (See 1 in the image below). A new page will be created.
  • You can remove pages by clicking the arrow icon (where the arrows are pointing towards each other). (See 2 in the image below).
  • You can also change the layout of the whole quiz by clicking the ‘Repaginate’ button.
  • Section headings may also be added to each new page.
    In the first page, click the ‘pencil’  icon and add your heading.
    For other pages, click the ‘Add’ link and choose ‘a new section heading’, and then add your heading.
    The section headings are displayed in the Quiz navigation block.
  • The order in which questions appear to the student may be randomized or ‘shuffled’ by ticking the ‘Shuffle’ box at the top of the screen.
    Where questions are in different sections, each section has its own ‘Shuffle’ box to tick. This means that you can mix up questions on one section, but in another section, where their order is important, you can keep them in the order you need them to display.
Quiz layout

Making questions conditional upon other questions

  • If using the Interactive with multiple tries or Immediate Feedback behaviour and with the navigation method set to ‘Free’, it is possible to make the display of a question dependent on a previous question being answered first.
  • The question editing page will display padlock icons to the right of each question:
  • If you want to make a question, for example Q2, conditional upon answering Q1, then click the padlock just above Q2.
    When a student accesses the quiz, they will see a message that Q2 is not available until they give a response to Q1.
    In the Quiz navigation block, Q2 will be greyed out.

Assigning points to questions

  • You can set how many points each question is worth by changing the number in the box to the right of each question and you can change the maximum grade by changing the number in the box top right at the top of the quiz. The default is one point per question and 100.00 maximum grade.
  • The quiz module will do any math, so for example, a 2 point question will be worth 2 times more when the Quiz module determines how many points out of 10 to award the student.

Previewing the quiz

  • You can preview individual questions by clicking the magnifying glass icon.
  • You can preview the whole quiz by clicking the “Preview” link in Administration>Quiz administration>Preview
  • The quiz works like a real quiz so you can see your grades and any feedback for correct/incorrect answers just as a student would see them.
  • To get a more accurate view of how a student would view your quiz, it is advised to log in with a “dummy” student account created by the admin for testing activities. This is more reliable than the ‘switch role to student’ feature.

After quiz has been attempted

  • If one or more students have taken the quiz, you will see a list of all the questions in the quiz and a notice saying that you cannot add or remove questions.
  • You can change the order of questions, regrade them, preview an individual question and click on a question edit link that will allow you to directly edit the question stored in the question bank.
  • You can delete all quiz attempts by students and then edit the quiz as if no students had attempted it. To do this, click the quiz name and then the Results link in the Administration block. This will present a list of students and their scores. Click “Select all” and then “Delete selected attempts”.

Viewing quiz results

To see the grades once students have done your quiz, you can either:

  • Click the quiz itself and then the link ‘Attempts =’ (where the number is the number of attempts) – or –
  • Click the quiz and then from the block Administration > Quiz administration, expand ‘Results’ and select the analysis you need.

Printing quizzes

Before you can print a quiz, you must ensure that the questions of the quiz are displayed on one page. To print a quiz activity:

1.  On your course main page, click the Turn Editing On button.

2.  Go to the quiz that you want to print. Click the Edit link at the right side of the quiz title and select Edit Settings.

3.  Scroll down and expand the Layout area.

4.  In the New Page menu, select Never, all questions on one page. Next, check the Repaginate now checkbox.

Quiz: Layout settings

5.  Click the Save and Display button. This will redirect you to a page like the image below. The change will move all the questions of the quiz onto one page.

Sample Quiz page

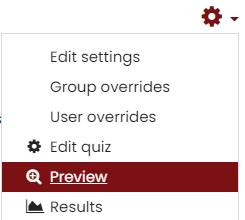
6. At the upper right corner of the quiz page, click the gear icon. A dropdown list will appear then select the  Preview link.

Quiz: Preview link

7.  When the preview begins and the questions are visible on the screen, use your browser’s print options to print the page. For most browsers, pressing CTRL+P (CMD+P on a Mac) on your keyboard will load the print menu.