Home > User Guides > VLE Guide for Instructors > Quizzing and Testing > Add and Configure a Quiz Activity
Add and Configure a Quiz Activity
Creating a new quiz is a two-step process. In the first step, you create the quiz activity and set its options which specify the rules for interacting with the quiz. In the second step, you add questions to the quiz. This page describes the options you can set for the quiz activity. The page “Add Questions in a Quiz” describes how to set up the questions for the quiz.
This page explains the settings involved when first creating a quiz activity. To add a quiz to your course page:
With the editing turned on at the course main page, locate the section you wish to add your quiz then click the Add an activity or resource link and choose Quiz. All settings may be expanded by clicking the Expand all link at the top right corner.
Configure the following quiz settings:
General
For the general settings, add a name here (which students will click on to access the quiz) and, if desired, a description of what they must do.
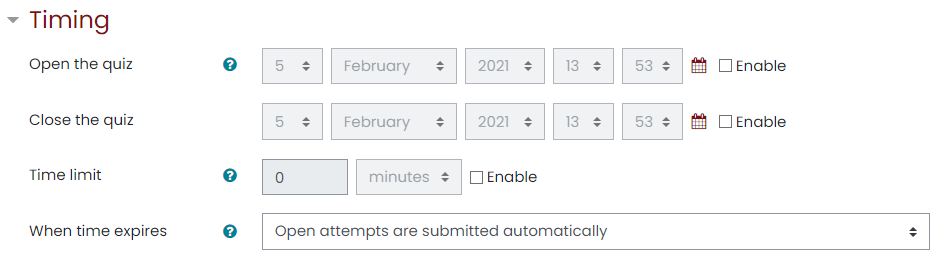
Timing
Note: The user’s time-zone – as set in the user profile – only affects how a time is displayed to that user. The actual timing for the quiz is not changed by that.
- Open the quiz
- If you tick off the Enable box, you can specify the date and time when the quiz is accessible for people to make attempts. Before the opening time, the quiz will be unavailable to students. They will be able to view the quiz introduction but will not be able to view the questions. Quizzes with start times in the future display both the open and close date for students.
- Close the quiz
- If you tick off the Enable box, the students will not be able to start new attempts after the closing time. Answers that the student submits after the quiz closing date will be saved but they will not be marked.
- Even after the quiz has closed students will still be able to see the quiz description and review their attempts. What exactly they will see depends on the settings you choose for review options (see below).
- Time limit
- By default, quizzes do not have a time limit, which allows students as much time as they need to complete the quiz. If you do specify a time limit, several things are done to try and ensure that quizzes are completed within that time:
- A countdown timer is shown in the quiz navigation block
- When the timer has run out, the quiz is submitted automatically with whatever answers have been filled in so far
- If a student manages to cheat and goes over the allotted time, no marks are awarded for any answers entered after the time ran out
- When time expires…
- It is always the case that if the student is actively working on the quiz when the countdown timer reaches zero, then their attempt will be automatically submitted at that moment. This setting only affects what happens if the student starts a timed attempt, then leaves the attempt, and then later time expires.
- There are three options as to what will happen when the time limit is up. Choose the one you need from the dropdown menu:
- Open attempts are submitted automatically (This is the default)
- There is a grace period when open attempts can be submitted, but no more questions answered
- Attempts must be submitted before time expires, or they are not counted
- If you select “There is a grace period…” then you can check the box to enable the “Submission grace period” and specify a period of time during which learners may still submit the quiz after the time is up.
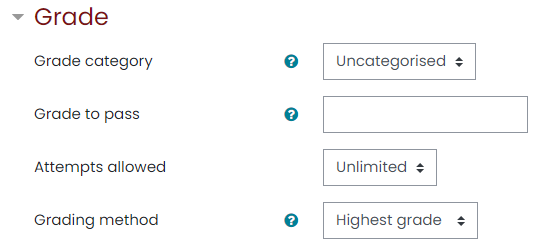
Grade
- Grade category
- If you have categories in your gradebook, select the one you wish the quiz to be in there. This setting controls the category in which this activity’s grades are placed in the gradebook.
- Grade to pass
- Here you can set a passing grade for the quiz. This may relate to Activity completion such that a student will not be able to access a follow up activity until they have passed the quiz.
- Attempts allowed
- Students may be allowed to have multiple attempts at a quiz. This can help make the process of taking the quiz more of an educational activity rather than simply an assessment.
- Grading method
- When multiple attempts are allowed, there are different ways you can use the grades to calculate the student’s final grade for the quiz.
- Highest grade – the final grade is the highest (best) grade in any attempt
- Average grade – the final grade is the average (simple mean) grade of all attempts
- First grade – the final grade is the grade earned on the first attempt (other attempts are ignored)
- Last grade – the final grade is the grade earned on the most recent attempt only
Layout
- New page
- For longer quizzes, it makes sense to stretch the quiz over several pages by limiting the number of questions per page. When adding questions to the quiz, page breaks will automatically be inserted according to the setting you choose here. However, you will also be able to move page breaks around by hand later in the editing page.
- Note that changing this setting has no effect on questions you have already added to the quiz. The setting will only apply to questions you add subsequently. To change the page breaks in an existing quiz, you need to go to the quiz editing screen, tick the ‘Show page breaks’ checkbox, then use the repaginate control.
- If you have many questions that use many high definition images and the server suffers performance issues, showing only one question per page is easier on the server that showing many (or all) questions in one page.
- Navigation method (available by clicking Show More)
- Choose Sequential instead of Free, if you want to force the student to progress through the questions in order and not go back to a previous question or skip to a later one

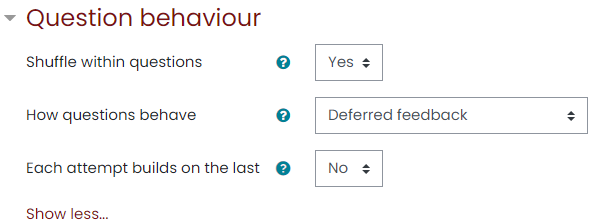
Question Behavior
- How questions behave
- This is the primary way to control the experience a student has as they interact with each question in the quiz.
- Adaptive mode and Adaptive mode (no penalties)
- Allows students to have multiple attempts at the question before moving on to the next question. This behaviour requires that the “Whether correct” box is ticked under “During the attempt” in the “Review options” section, at a minimum.
- Deferred feedback
- Students must enter an answer to each question and then submit the entire quiz, before anything is graded, or they get any feedback.
- Immediate feedback
- Like interactive mode in that the student can submit their response immediately during the quiz attempt, and get it graded. However, they can only submit one response, they cannot change it later.
- Deferred feedback or Immediate feedback with Certainty-based marking (CBM)
- With CBM, the student does not only answer the question, but they also indicate how sure they are they got the question right. The grading is adjusted by the choice of certainty, so that students must reflect honestly on their own level of knowledge to get the best mark.
- Interactive with multiple tries
- Used for allowing multiple attempts on the same question (perhaps with a grade penalty). Students answer the question and click the ‘Check’ button. If the answer is wrong, the student can click the ‘Try again’ button to try a new response. Importantly, the question definition must contain hints that will be shown after each incorrect attempt, though the hint text can be as minimal as an HTML non-breaking space. Once the student has got the question right, they can no longer change their response. Once the student has got the question wrong too many times, they are just graded wrong (or partially correct) and get shown the feedback. Unless ‘Allow redo within an attempt’ was enabled in the ‘Question behaviour‘ settings of the quiz, they can no longer change their answer. There can be specific feedback after each try the student makes, in addition to overall feedback about incorrect or correct answers and answer choices. The number of tries the student gets is the number of hints in the question definition plus one, with a minimum of three.
- Allow redo within an attempt (available for Immediate Feedback & Interactive with multiple tries)
- If using Interactive or Immediate feedback mode, enabling this setting means students can try a question again even if they have used up their allowed attempts. This is helpful if they wish to learn from the feedback given at the end of their attempts. Importantly, for students to continue with the same question, the question definition must contain hints. It must also have been added manually into the quiz, rather than randomly. Otherwise, the ‘redo’ will occur with a different question from the one they were working on previously if there are other questions available (such as when the question slot is filled by a random question). A student’s grade for that question slot is based on the most recent question they have started. Note: by default, students are allowed three tries to answer a question correctly in Interactive mode before the ‘redo’ option becomes available. The number of tries cannot be reduced but it can be increased by adding more hints to the question in the ‘Multiple tries’ section of the question’s configuration page.
- Each attempt builds on the last (available by clicking “Show more”)
- If multiple attempts are allowed and this setting is set to Yes, then each new attempt contains the results of the previous attempt. This allows the student on the new attempt to concentrate on just those questions that were answered incorrectly on the previous attempt. If this option is chosen then each attempt by a student uses the same questions in the same order, independent of randomization settings. To show a fresh quiz on every attempt, select No for this setting.
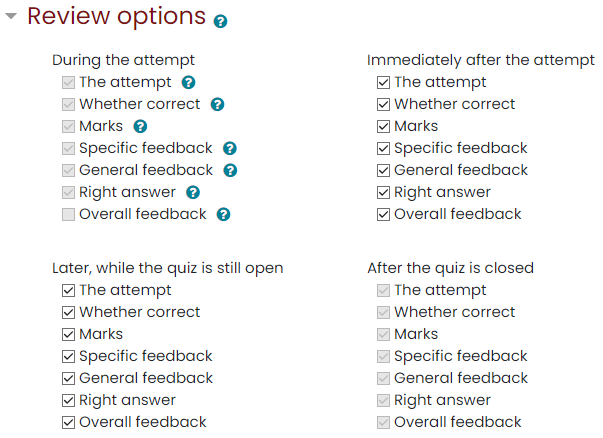
Review options
This section controls what information students will be shown when they review their past attempts at the quiz, and during the attempt in adaptive mode. It is a matrix with check boxes.
The various pieces of information that can be controlled are:
- The attempt
- Will show how the student responded to each question.
- Whether correct
- Displays whether the student’s response to each question is correct or incorrect.
- Marks
- Reveals the marks awarded to the student and the grade for the quiz.
- Specific feedback
- Will show the feedback for the response to the answer as set when adding the question to the quiz. Each response to a question may be given a feedback for both correct and incorrect answers.
- General feedback
- Displays the general feedback for the whole question as set when adding the question to the quiz. You can use the general feedback to give students some background to what knowledge the question was testing.
- Right answer
- Reveals the correct answer to each question, whether the student answered correctly or not (See note below).
- Overall feedback
- Displays feedback for the entire quiz as set in the quiz settings.
- Displays feedback for the entire quiz as set in the quiz settings.
For each of the above items, you can determine the timeframe when the students will see them:
- During the attempt
- is only available when ‘How questions behave’ has been set to ‘Immediate feedback’, ‘Immediate feedback with CBM’ and ‘Interactive with multiple tries’. If set to one of these options, then a ‘Check’ button will appear below the answer and when clicked the student will submit that response and then receive immediate feedback.
- Immediately after the attempt
- means within 2 minutes of the student clicking “submit all and finish”.
- Later, while the quiz is still open
- means after 2 minutes, but before the close date (if the quiz does not have a close date, this phase never ends).
- After the quiz is closed
- means what it says (you never get here for quizzes without a close date).
Note: Currently, the Answers display is a bit inconsistent between different question types. For example, the matching question type shows students which of their responses are correct but does not tell them the right answer for the ones they got wrong. The short answer and multiple choices question types do tell the student what the correct answer is.
In your list of review options, you must have ‘The attempt’ (the first option in the lists) selected before you can enable the options to show ‘Whether correct’, ‘Specific feedback’, ‘General feedback’, and ‘Right answer’. If you choose not to let the students review the attempt, your only options are to display ‘Marks’ and ‘Overall feedback’.
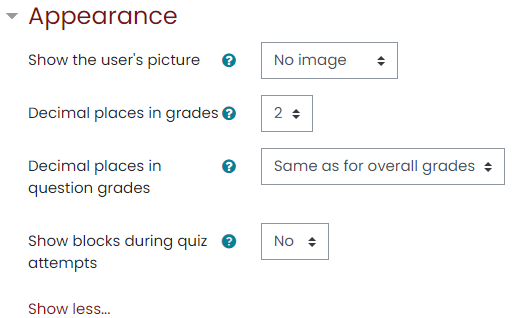
Appearance
- Show the user’s picture
- If enabled, a student’s name and picture will be shown on-screen during the attempt, and on the review screen, making it easier to check that the student is logged in as themselves in an invigilated (proctored) exam.
- Decimal places in grades
- This option determines how many digits will be shown after the decimal separator when the grade is displayed. A setting of 0 for example means that the grades are displayed as integers. This setting is only used for the display of grades, not for the display or marking of answers.
- Decimal places in question grades
- This setting specifies the number of digits shown after the decimal point when displaying the grades for individual questions. For example, you may want to see the total as a whole number, but still show fractional grades for each question.
- Show blocks during quiz attempts
- By default, this is an advanced setting. You need to click Show more … to reveal it. You can control whether blocks are shown on the page during quiz attempts.
Safe Exam Browser
- Require the use of Safe Exam Browser
- If enabled, students can only attempt the quiz using the Safe Exam Browser. The available options are:
- No
- Safe Exam Browser is not required to attempt the quiz.
- Yes – Use an existing template
- A template for the configuration of Safe Exam Browser can be used. Templates are managed in the site administration. Your manual settings overwrite the settings in the template.
- Yes – Configure manually
- No template for the configuration of Safe Exam Browser will be used. You can configure Safe Exam Browser manually.
- Yes – Upload my own config
- You can upload your own Safe Exam Browser configuration file. All manual settings and the use of templates will be disabled.
- Yes – Use SEB client config
- No configurations of Safe Exam Browser are on the Moodle side. The quiz can be attempted with any configuration of Safe Exam Browser.

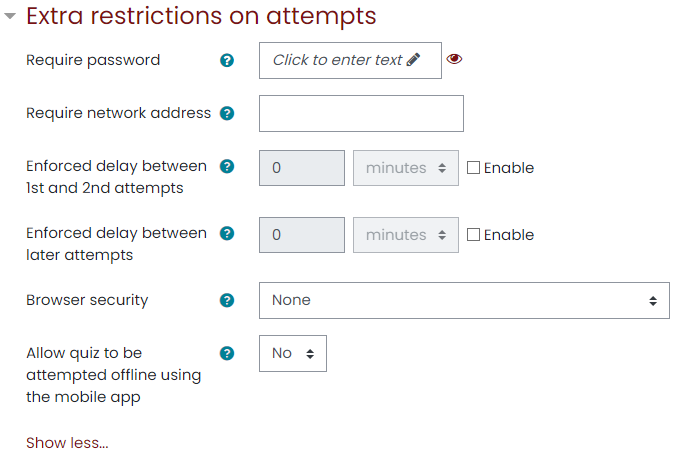
Extra restrictions on attempts
- Require password
- If you specify a password in here, then participants must enter the same password before they can try on the quiz. This is useful to give only a selected group of students’ accesses to the quiz.
- Enforced delay between attempts
- You can set a time (from seconds to weeks) between the first and second attempt of a quiz. You can also (or alternatively) set a time from seconds to weeks for subsequent attempts after the second attempt. Thus, you might allow a student to take the quiz twice immediately with no delay, but if they want to improve their score with a third attempt, they are forced to wait a week and use the time for extra revision.
- Browser security
- This is by default an advanced field, visible by clicking “Show more”.
- The options in this section offer various ways to try to restrict how students may try to ‘cheat’ while attempting a quiz. However, this is not a simple issue, and what in one situation is considered ‘cheating’ may, in another situation, just be effective use of information technology. (For example, the ability to quickly find answers using a search engine.)
- Note also that this is not just at problem of technology with a technical solution. Cheating has been going on since long before computers, and while computers make certain actions, like copy and paste, easier, they also make it easier for teachers to detect cheating – for example using the quiz reports. The options provided here are not fool-proof, and while they do make some forms of cheating harder for students, they also make it more inconvenient for students to attempt the quizzes, and they are not fool-proof.
- Full screen pop-up with some JavaScript security
- There is a limit to what the quiz, which runs on a web server, can do to restrict what the student sitting at their computer can do while attempting the quiz. However, this option does what is possible:
- The quiz will only start if the student has a JavaScript-enabled web-browser.
- The quiz appears in a full screen popup window that covers all the other windows and has no course navigation controls. (However, it is impossible for a web site to create a browser window that cannot be minimized or moved aside.)
- The students are prevented, as far as is possible, from using facilities like copy and paste.
Overall feedback
Overall feedback is shown to a student after they have completed an attempt at the quiz. The text that is shown can depend on the grade the student got. Click “Show editing tools” to display the rich text editor and drag the bottom right of the text box out to expand it.
For example, if you entered:
- Grade boundary: 100%
- Feedback: “Well done”
- Grade boundary: 40%
- Feedback: “Please study this week’s work again”
- Grade boundary: 0%
Then students who score between 100% and 40% will see the “Well done” message, and those who score between 39.99% and 0% will see “Please study this week’s work again”. That is, the grade boundaries define ranges of grades, and each feedback string is displayed to scores within the appropriate range.
Note that the maximum and minimum grade boundaries (100% and 0%) are set automatically.
You can set as many or as few grade boundaries as you wish. The form allows you up to 3 ranges at first, but you can add more by clicking the “Add 3 more feedback fields ” button underneath.
If you want to reduce the number of boundaries and feedbacks, you will need to remove all feedbacks and boundaries and then add the reduced amount.

Other settings
Choose the ‘Common module’, ‘Restrict access’, ‘Activity Completion’, and ‘Tags’ settings as you would when you set up any resource or activity. These general settings are further discussed in Activities and Resources: General Settings.